Ceramic plate decorating kits offer a wonderful opportunity to transform plain plates into unique and personalized pieces of art. Whether you’re a seasoned artist or a curious beginner, these kits provide all the necessary tools and materials to unleash your creativity and bring your artistic visions to life on ceramic surfaces.
The history of ceramic plate decoration spans centuries, with ancient civilizations utilizing pottery as a medium for expressing their artistic sensibilities and cultural narratives. Today, ceramic plate decorating kits have evolved to cater to a wide range of skill levels and interests, offering a captivating and accessible way to engage in this timeless craft.
Choosing the Right Ceramic Plate Decorating Kit

Choosing the right ceramic plate decorating kit can be exciting, but with so many options available, it’s important to consider your skill level, project type, and budget. This guide will help you navigate the world of ceramic plate decorating kits and find the perfect one for your needs.
Factors to Consider When Selecting a Kit
Before diving into the world of ceramic plate decorating kits, it’s important to consider the key factors that will influence your decision.
- Paint Quality:Ceramic paints are generally categorized as either acrylic or oil-based. Acrylic paints are water-based, making them easier to clean up and faster drying. Oil-based paints offer richer colors and a smoother finish, but require mineral spirits for cleanup and longer drying times.
- Brush Types:The brushes included in a kit are crucial for achieving different effects. Look for a kit with a variety of brush sizes and shapes, such as round, flat, and angled brushes, to accommodate various details and techniques.
- Stencil Designs:Stencils offer a convenient way to create intricate patterns and designs. Consider the complexity and style of the stencils included in the kit, ensuring they align with your project goals.
Choosing a Kit Based on Skill Level
- Beginner:If you’re new to ceramic plate decorating, choose a kit with simple instructions, basic tools, and pre-designed stencils. This will help you get started without feeling overwhelmed.
- Intermediate:As your skills develop, consider a kit with more advanced tools, such as fine-tipped brushes and multi-colored paints. This will allow you to explore more complex designs and techniques.
- Advanced:For experienced ceramic decorators, look for kits that offer professional-grade paints, a wide range of brushes, and blank plates for maximum creative freedom.
Choosing a Kit Based on Project Type, Ceramic plate decorating kit
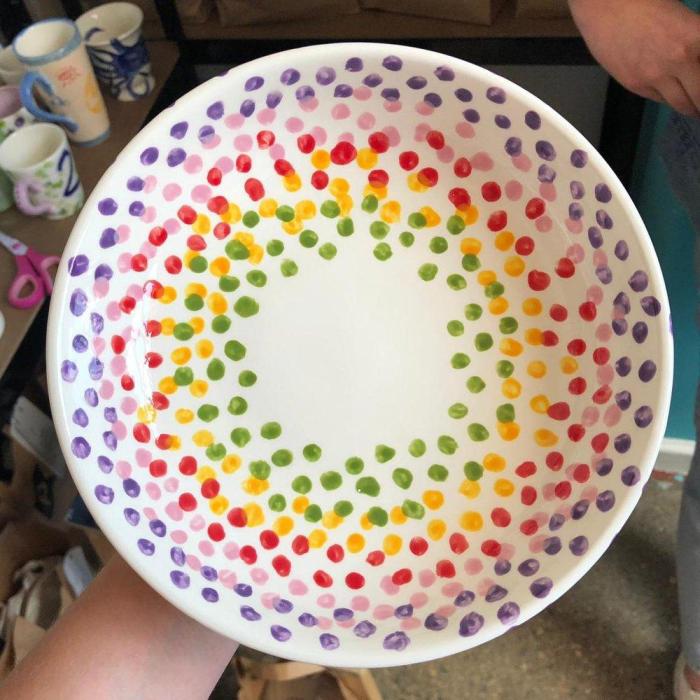
- Simple Designs:For basic designs like dots, stripes, or simple patterns, a kit with basic tools and pre-designed stencils will suffice.
- Intricate Designs:If you’re aiming for detailed artwork, opt for a kit with fine-tipped brushes, multiple paint colors, and a variety of stencils.
- Personalized Plates:For personalized plates with names, dates, or special messages, consider a kit that includes fine-tipped brushes and a selection of paint colors.
Choosing a Kit Based on Budget
- Budget-Friendly:Look for kits with basic tools and pre-designed stencils. These kits are often available at affordable prices and offer a good starting point for beginners.
- Mid-Range:Kits in this category offer a balance of quality and affordability. They typically include a wider range of tools and paint colors, suitable for intermediate decorators.
- Premium:For professional-grade tools and paints, consider investing in a premium kit. These kits often include high-quality materials and a comprehensive selection of tools.
Finding Reputable Brands and Retailers
- Online Retailers:Websites like Amazon, Etsy, and Michaels offer a wide selection of ceramic plate decorating kits. Compare prices and read customer reviews before making a purchase.
- Craft Stores:Local craft stores often carry a variety of ceramic plate decorating kits, allowing you to browse and get expert advice from staff.
- Specialty Stores:Some stores specialize in ceramics and pottery, offering a curated selection of kits and supplies for both beginners and experienced decorators.
Preparing the Plate for Decoration
Before you start painting your ceramic plate, it’s essential to prepare it for decoration. This involves a few crucial steps that ensure a smooth and even surface for your paint to adhere to. A well-prepared plate will result in a beautiful and long-lasting finish.
Ceramic plate decorating kits are a fun way to personalize your home décor, and they can add a touch of charm to any room. If you’re looking for a way to create a cozy and welcoming atmosphere, consider incorporating some country rustic front porch decor, like rustic planters or vintage signs.
These elements can complement your hand-painted ceramic plates, creating a cohesive and inviting aesthetic that reflects your personal style.
Cleaning the Plate
Thoroughly cleaning the plate removes any dust, grease, or residue that could interfere with the paint’s adhesion. This step is vital because any impurities on the surface can prevent the paint from adhering properly, leading to uneven coverage, peeling, or cracking.
Ceramic plate decorating kits are a fun way to personalize your wedding décor. If you’re aiming for a rustic theme, consider incorporating elements from bulk rustic wedding decor like burlap, wood, and mason jars. You can even paint the plates with rustic designs to complement your overall aesthetic.
This DIY approach allows for a unique touch that reflects your personal style and creates a memorable wedding experience.
- Use warm, soapy water and a soft sponge or cloth to wash the plate gently. Avoid using abrasive cleaners or scrubbers that could scratch the surface.
- Rinse the plate thoroughly with clean water to remove any soap residue. If you are using a brand-new plate, you can skip this step, but it’s always a good idea to wipe it down with a damp cloth to remove any dust or debris.
A ceramic plate decorating kit can be a fun and creative way to personalize your home decor. If you’re going for a country rustic home decor aesthetic, consider using earthy tones and simple designs on your plates. These hand-painted pieces can add a unique and charming touch to your kitchen or dining room, making each meal feel special.
- Let the plate air dry completely before proceeding to the next step.
Sanding the Plate
Sanding the plate creates a smooth and even surface that helps the paint adhere better. This step is especially important for plates with rough or uneven surfaces. Sanding also helps to remove any imperfections or blemishes that might be present on the plate.
- Use fine-grit sandpaper (220-400 grit) to gently sand the entire surface of the plate, focusing on any rough areas. Remember to sand in one direction, as sanding back and forth can create scratches.
- Sand lightly, applying gentle pressure. Avoid sanding too aggressively, as this can damage the plate’s surface.
- After sanding, wipe the plate clean with a damp cloth to remove any sanding dust.
Priming the Plate
Priming the plate creates a barrier between the ceramic surface and the paint, ensuring a smooth and even finish. Primer also helps to prevent the paint from bleeding into the ceramic, especially with light-colored paints.
- Use a ceramic primer specifically designed for painting on ceramic surfaces. Choose a primer that is compatible with the type of paint you plan to use.
- Apply a thin, even coat of primer to the entire surface of the plate. Use a brush or a spray primer, depending on your preference.
- Let the primer dry completely according to the manufacturer’s instructions before proceeding to the next step.
Advanced Techniques for Ceramic Plate Decoration

Once you’ve mastered the basics of ceramic plate decorating, you can explore more advanced techniques to create truly unique and stunning pieces. These techniques allow you to add depth, texture, and visual interest to your designs, pushing the boundaries of what you can achieve with paint and glaze.
Using Multiple Colors
Multiple colors add vibrancy and depth to your designs. You can create gradients, patterns, or intricate details by blending, layering, or outlining colors.
- Blending: Achieving smooth transitions between colors by applying one color over another while it’s still wet. This creates a gradual change in hue.
- Layering: Applying multiple colors in succession, allowing each layer to dry before applying the next.
This creates a layered effect with visible differences between each color.
- Outlining: Defining shapes and details using a contrasting color. This creates a sharp, defined edge and adds dimension to the design.
Creating Textures
Adding texture to your ceramic plates can create a tactile experience and enhance the visual appeal. There are various ways to introduce texture:
- Sponging: Using a sponge to apply paint in a dabbing motion, creating a mottled or speckled effect.
- Stamping: Using stencils, stamps, or even everyday objects to create repeating patterns or unique designs.
- Sgraffito: Scratching through a layer of glaze or paint to reveal the underlying color.
This technique allows for intricate details and decorative patterns.
Incorporating Mixed Media
Mixed media involves combining different materials and techniques to create a more complex and interesting design.
- Adding Decals: Applying pre-made designs or images to the ceramic plate. Decals come in various styles and themes, offering a quick and easy way to add intricate details.
- Incorporating Found Objects: Attaching small objects like buttons, beads, or even dried flowers to the ceramic plate using glue or glaze.
This adds a unique, personalized touch.
- Combining Painting with Other Techniques: Combining painting with techniques like stenciling, stamping, or even embroidery to create multi-layered and visually rich designs.
Firing and Glazing Ceramic Plates

After you’ve finished decorating your ceramic plate, the next step is firing and glazing. This process transforms your artwork into a durable and beautiful piece that can be enjoyed for years to come. Firing involves heating the plate to a high temperature in a kiln, which fuses the paint to the ceramic surface.
Glazing adds a protective layer that enhances the colors and makes the plate waterproof and food-safe.
Firing Temperatures
Firing temperature is crucial for achieving the desired results. Different types of ceramic plates require different firing temperatures. The type of paint used for decoration also plays a role in determining the appropriate firing temperature. It’s important to consult the manufacturer’s instructions for your specific ceramic plate and paint to ensure that you fire it at the correct temperature.
Glazes
Glazes are liquid suspensions of glass-forming materials that are applied to ceramic surfaces. They melt and fuse to the ceramic during firing, creating a smooth, glossy, and waterproof surface. Glazes come in a wide variety of colors, finishes, and textures.
Some glazes are transparent, while others are opaque. Some glazes are glossy, while others are matte. The type of glaze you choose will depend on the desired aesthetic for your ceramic plate.
Safety Precautions
Firing and glazing ceramic plates involve working with high temperatures and potentially hazardous materials. It’s essential to take safety precautions to prevent injuries and damage.
- Always wear appropriate safety gear, such as gloves, safety glasses, and a respirator mask when handling glazes and firing ceramic plates.
- Work in a well-ventilated area to avoid inhaling fumes.
- Never leave a kiln unattended while it’s in operation.
- Always follow the manufacturer’s instructions for operating the kiln and handling glazes.
End of Discussion: Ceramic Plate Decorating Kit
With the right ceramic plate decorating kit, you can embark on a journey of artistic expression, creating personalized pieces that reflect your individual style and preferences. From simple designs to intricate masterpieces, the possibilities are boundless, allowing you to transform ordinary plates into cherished keepsakes, unique gifts, or captivating home décor elements.
Helpful Answers
What kind of paint is used in ceramic plate decorating kits?
Ceramic plate decorating kits typically use acrylic paints specifically designed for use on ceramic surfaces. These paints are durable, heat-resistant, and designed to withstand the firing process.
How long does it take for the paint to dry on a ceramic plate?
The drying time for ceramic paints varies depending on the specific brand and type of paint used. However, most acrylic paints for ceramic surfaces take about 24 hours to dry completely.
What are the different types of glazes used in ceramic plate decorating?
There are various types of glazes used in ceramic plate decorating, including clear glazes, colored glazes, and matte glazes. The choice of glaze depends on the desired finish and aesthetic effect.